A Carpuride gives you wireless CarPlay and Android Auto on a screen that lives right above the stock dash. I fitted a W702S Pro to my 2026 DS900X. Here is exactly how it went, including how to get behind the windscreen to reach the wiring.
The whole job took about 1.5 to 2 hours. A large portion of that time was fitting and testing the different brackets that were included. If you already know which bracket to use, you will probably be faster.
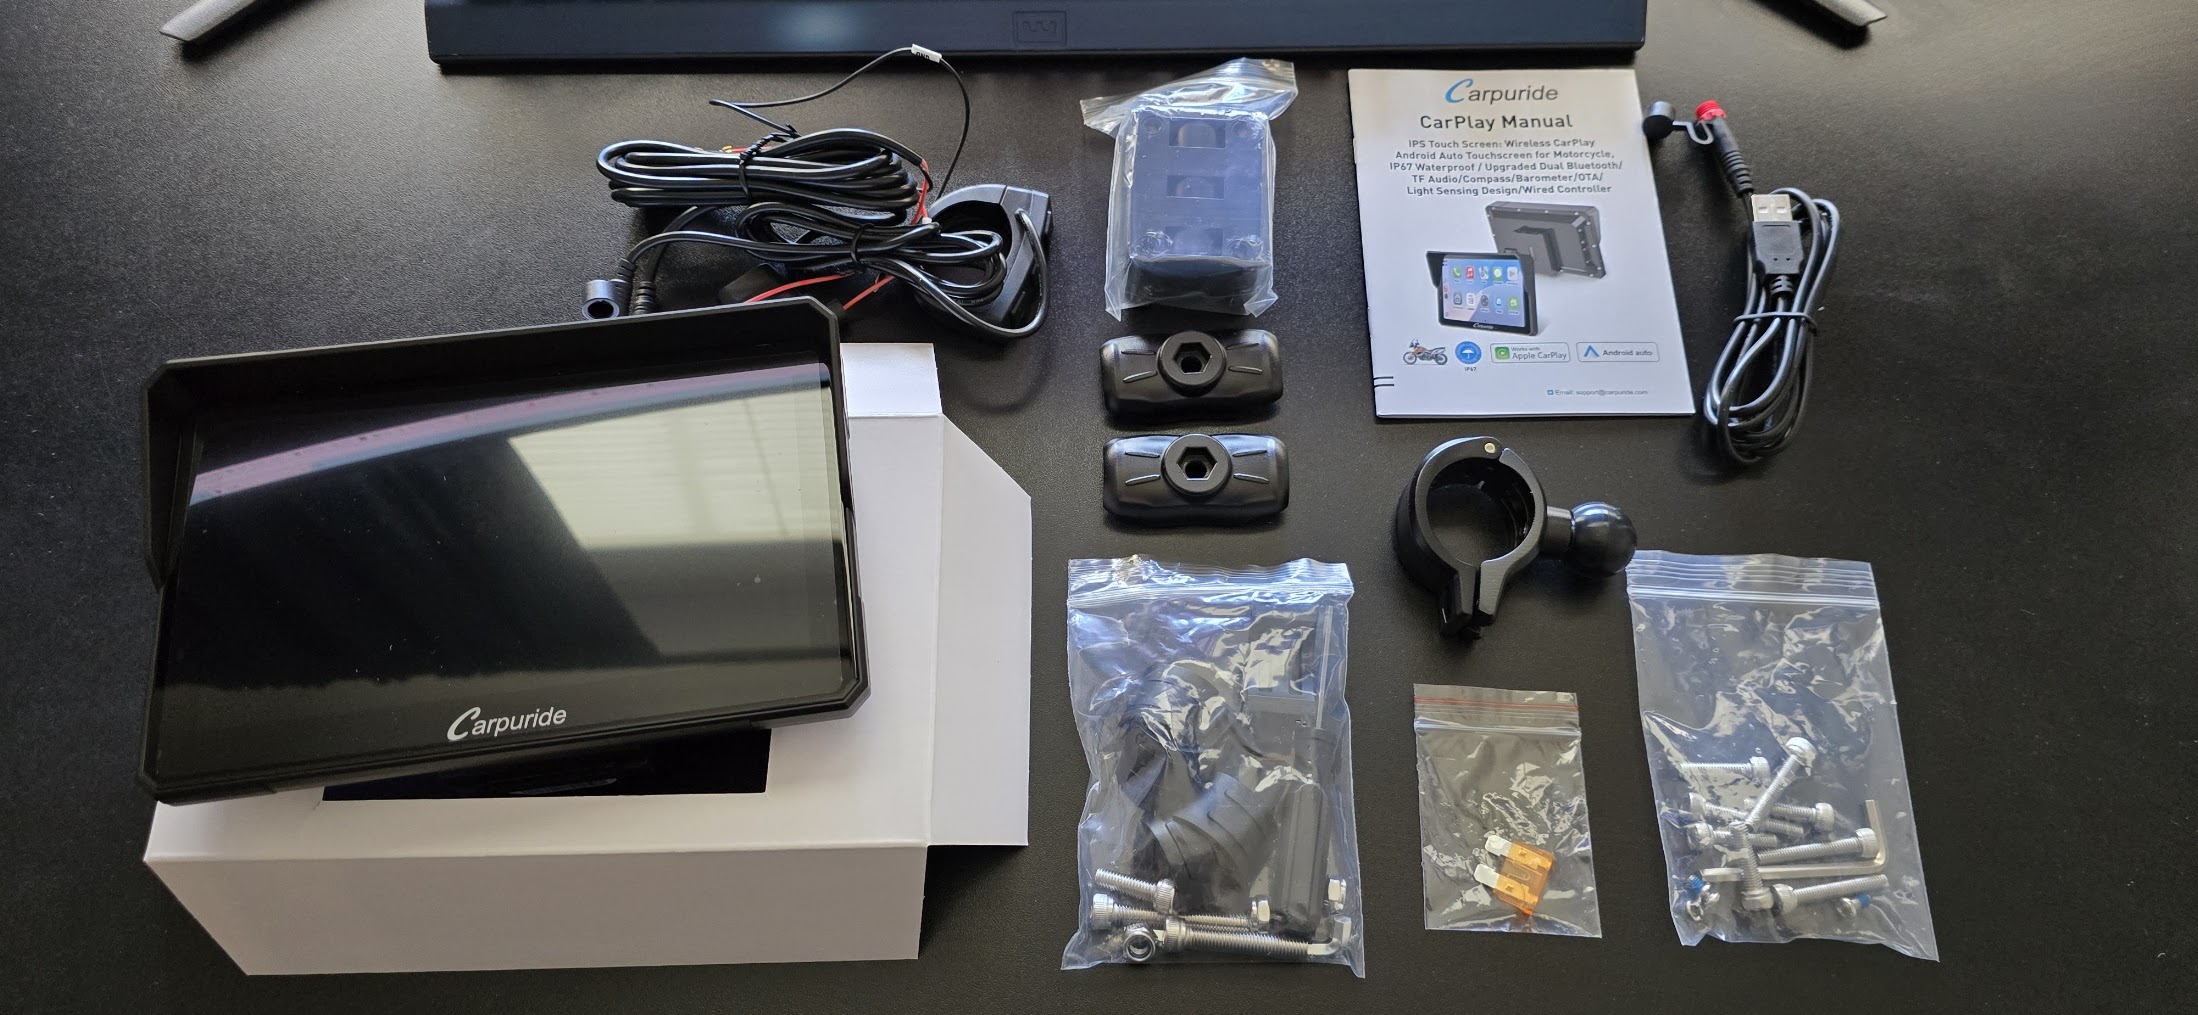
What you need
The screen itself is a Carpuride W702S Pro, 339.90 USD from carpuride.com. Use code VOGERIDERS for 30% off.
The kit comes with a hardwire kit (attach directly to the battery or any other 12V source) and a USB cable. I used the hardwire kit. The USB cable is handy for bench testing the unit on a computer first, and you can also just run it off a USB socket on the bike if that suits you better.
The DS900X has no purpose-made bracket, other than the handlebar itself, so I bought one on AliExpress: link to the product. The screen mounts on the Carpuride's own BM05 cradle, so the AliExpress part is really just an arm that holds that cradle where I want it. The arm bolts in behind the dashboard and sticks up above the stock display. I had installed mine earlier so I don't have any pictures from that, but you will see in the pictures below exactly how mine is mounted.
Tools:
- Torx T25 and T30
- Phillips screwdriver
- Flat screwdriver (to pop off the two clips holding the windscreen mount, and the plastic cover after removing the two Phillips screws)
- Wire stripper
- Solder-seal connectors (the tubular kind, you heat them and the solder inside melts into the joint)
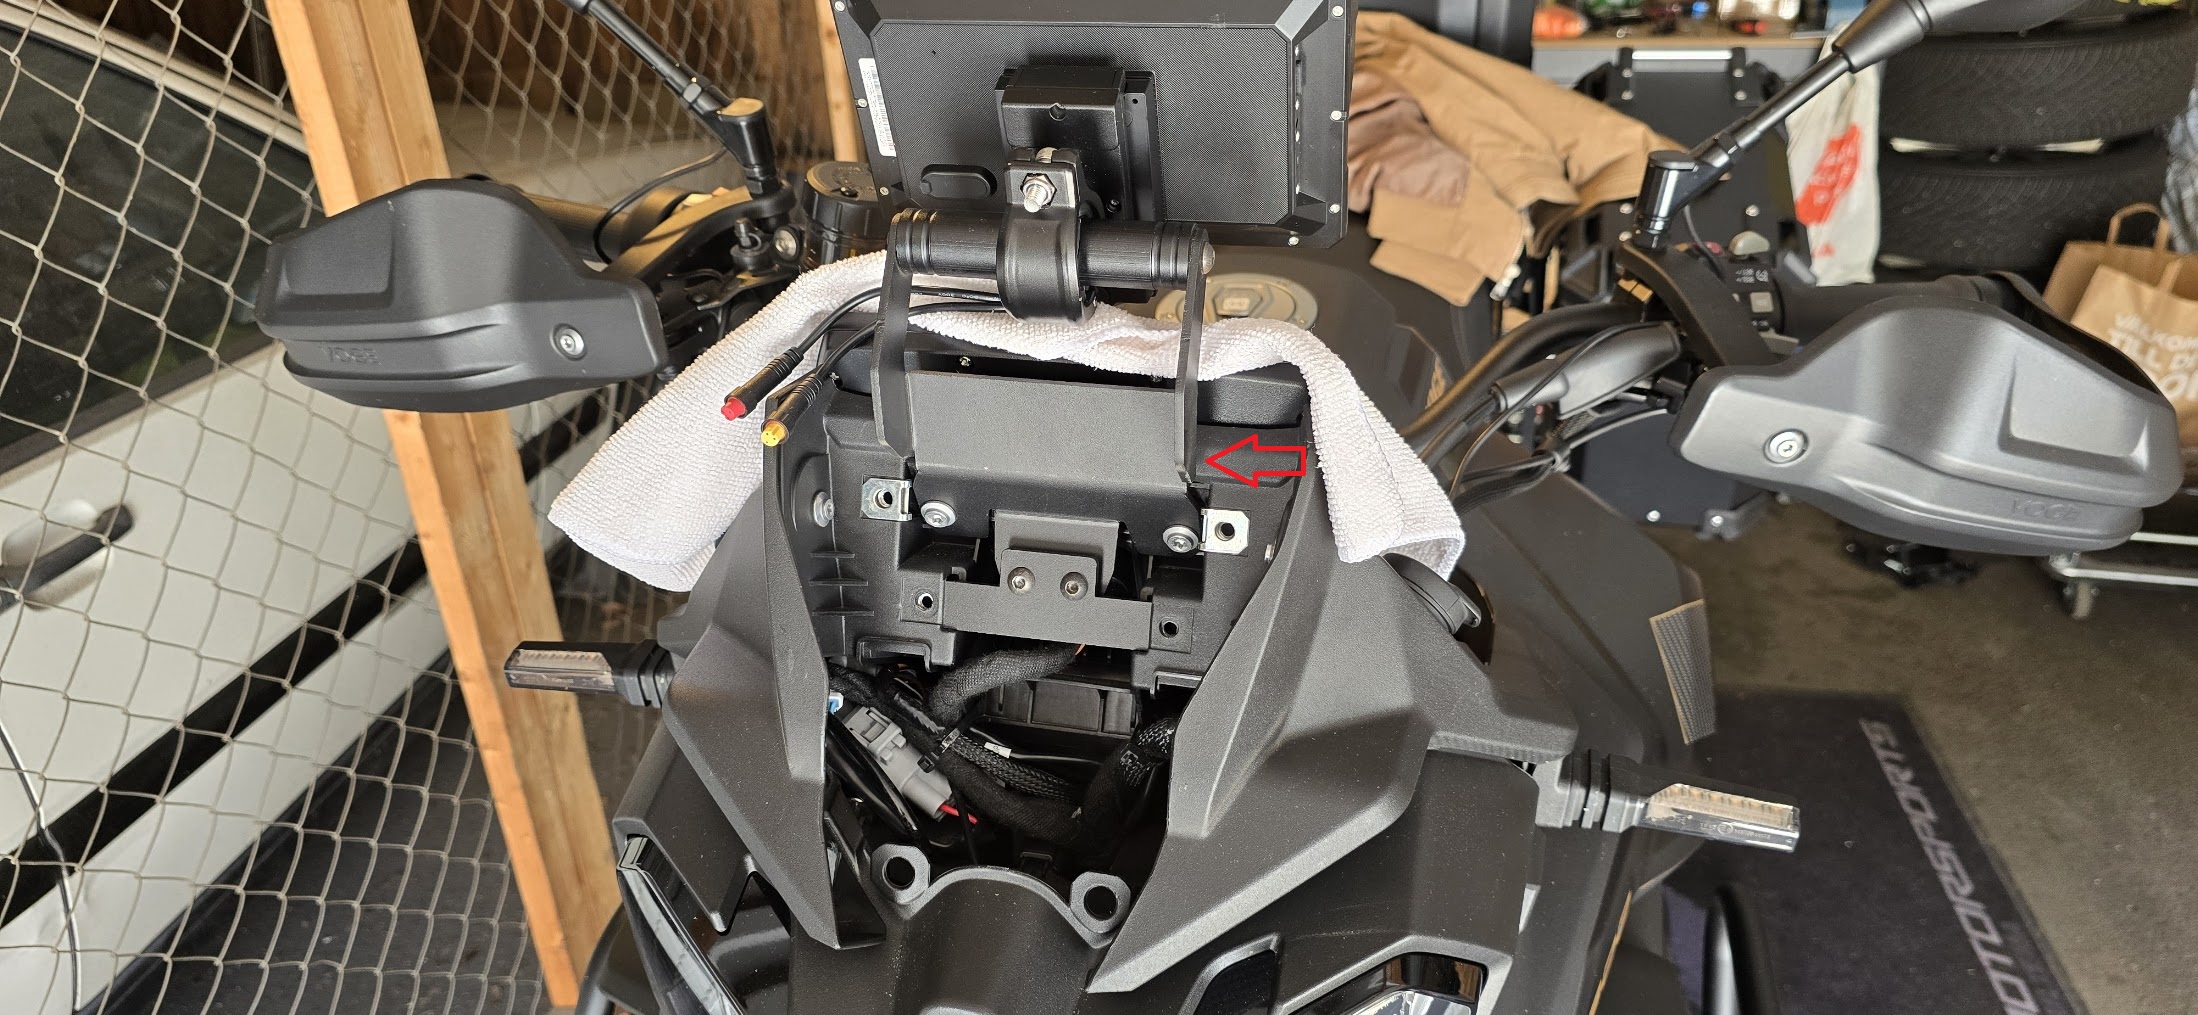
Getting to the wiring
Everything you need to reach lives behind the dashboard, so the bike has to come apart in this order. Key off before you start.
- Remove the windscreen by unscrewing the four T30 Torx screws.
- Optional step - this can be skipped but if you do you will need to move the inner cover around inside the windshield mount to reach each Torx screw:
- Pop the two clips holding the bottom of the windscreen holder.
(Please note: Be very careful when removing the clips - they tend to fly away and they can be really hard to spot on the ground!)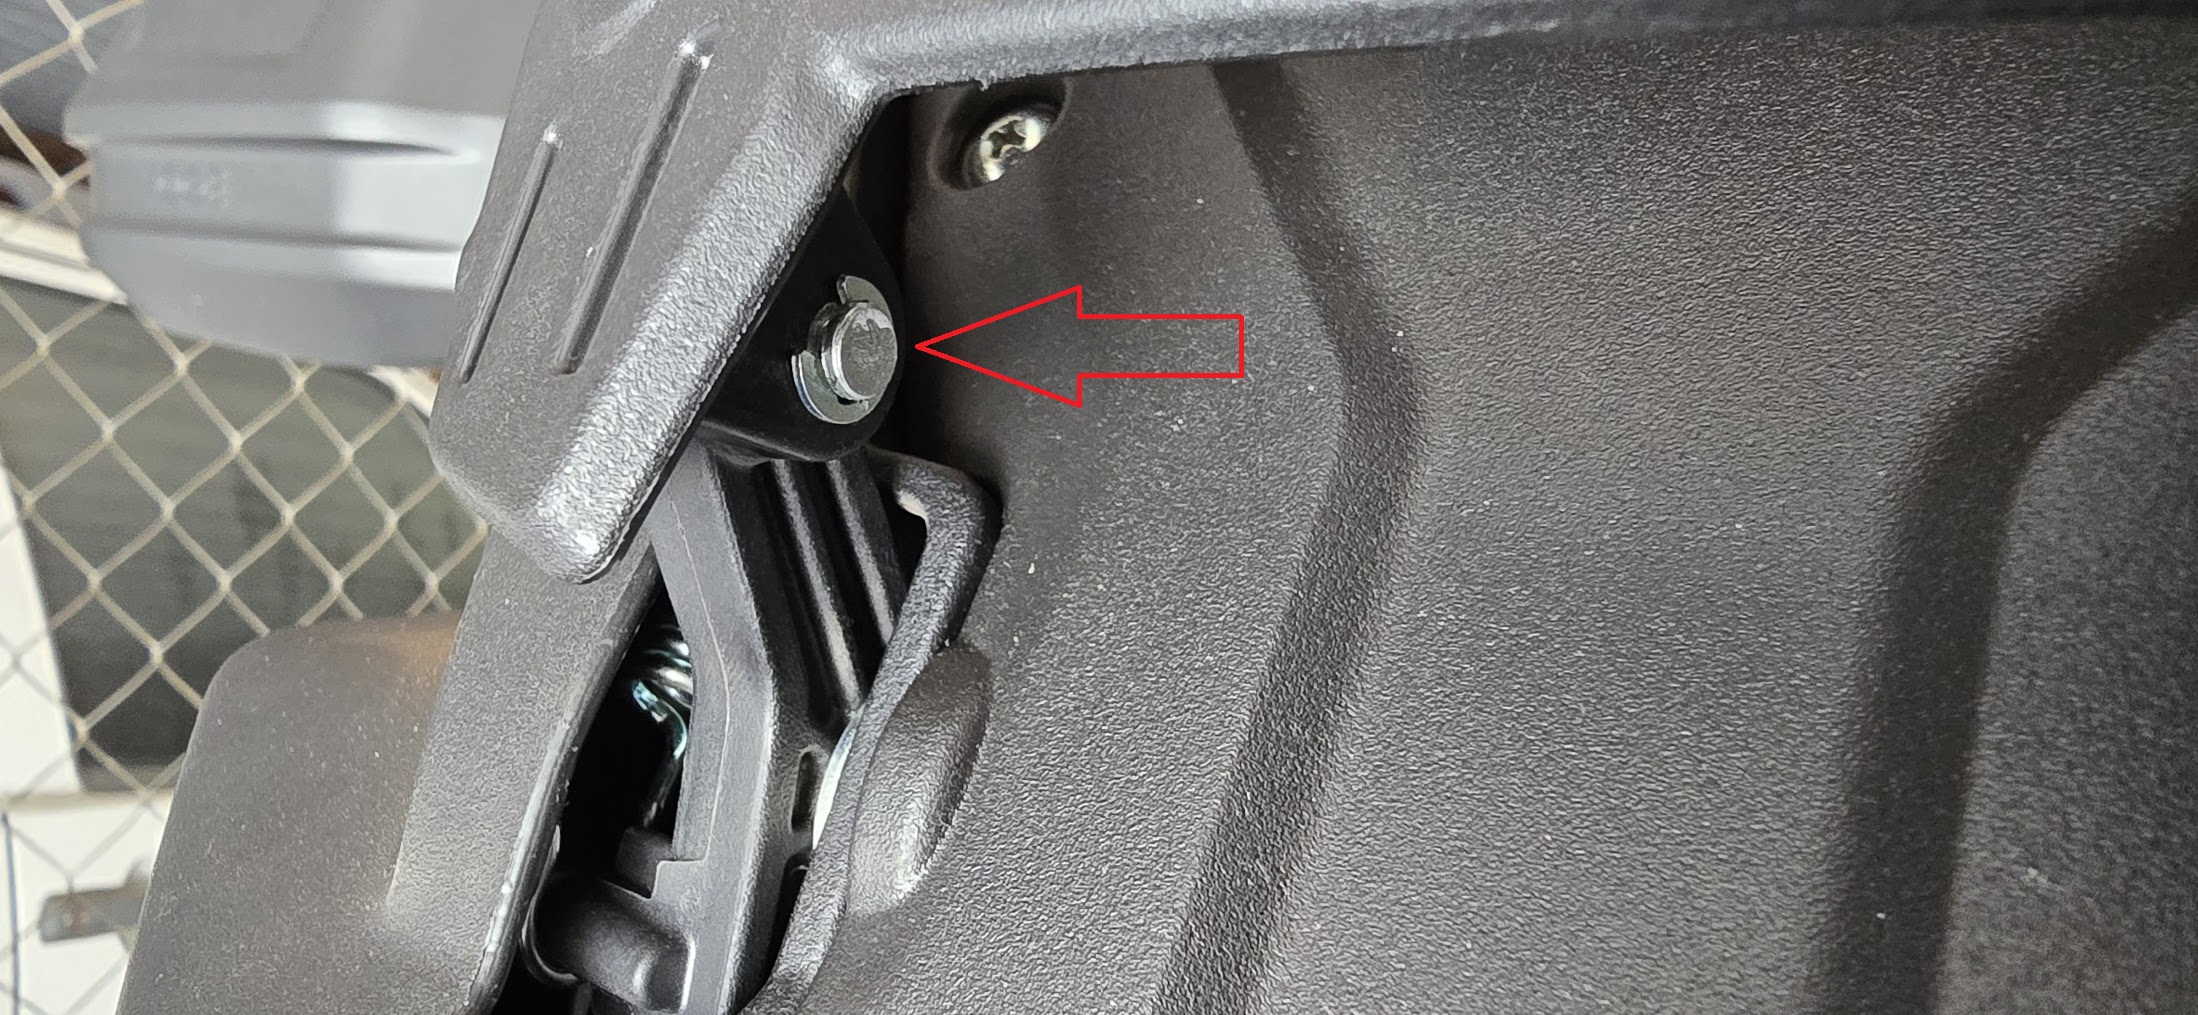
- After that you can knock the two bolts out (they are tightly fitted) and then tilt the holder up.
- Pop the two clips holding the bottom of the windscreen holder.
- Either remove the cover held by two Phililps screws, or move it inside the windshield mount.
- That exposes another 4x T30 and 2x T25 screws which hold the windscreen mount. Remove them and the whole assembly lifts away.
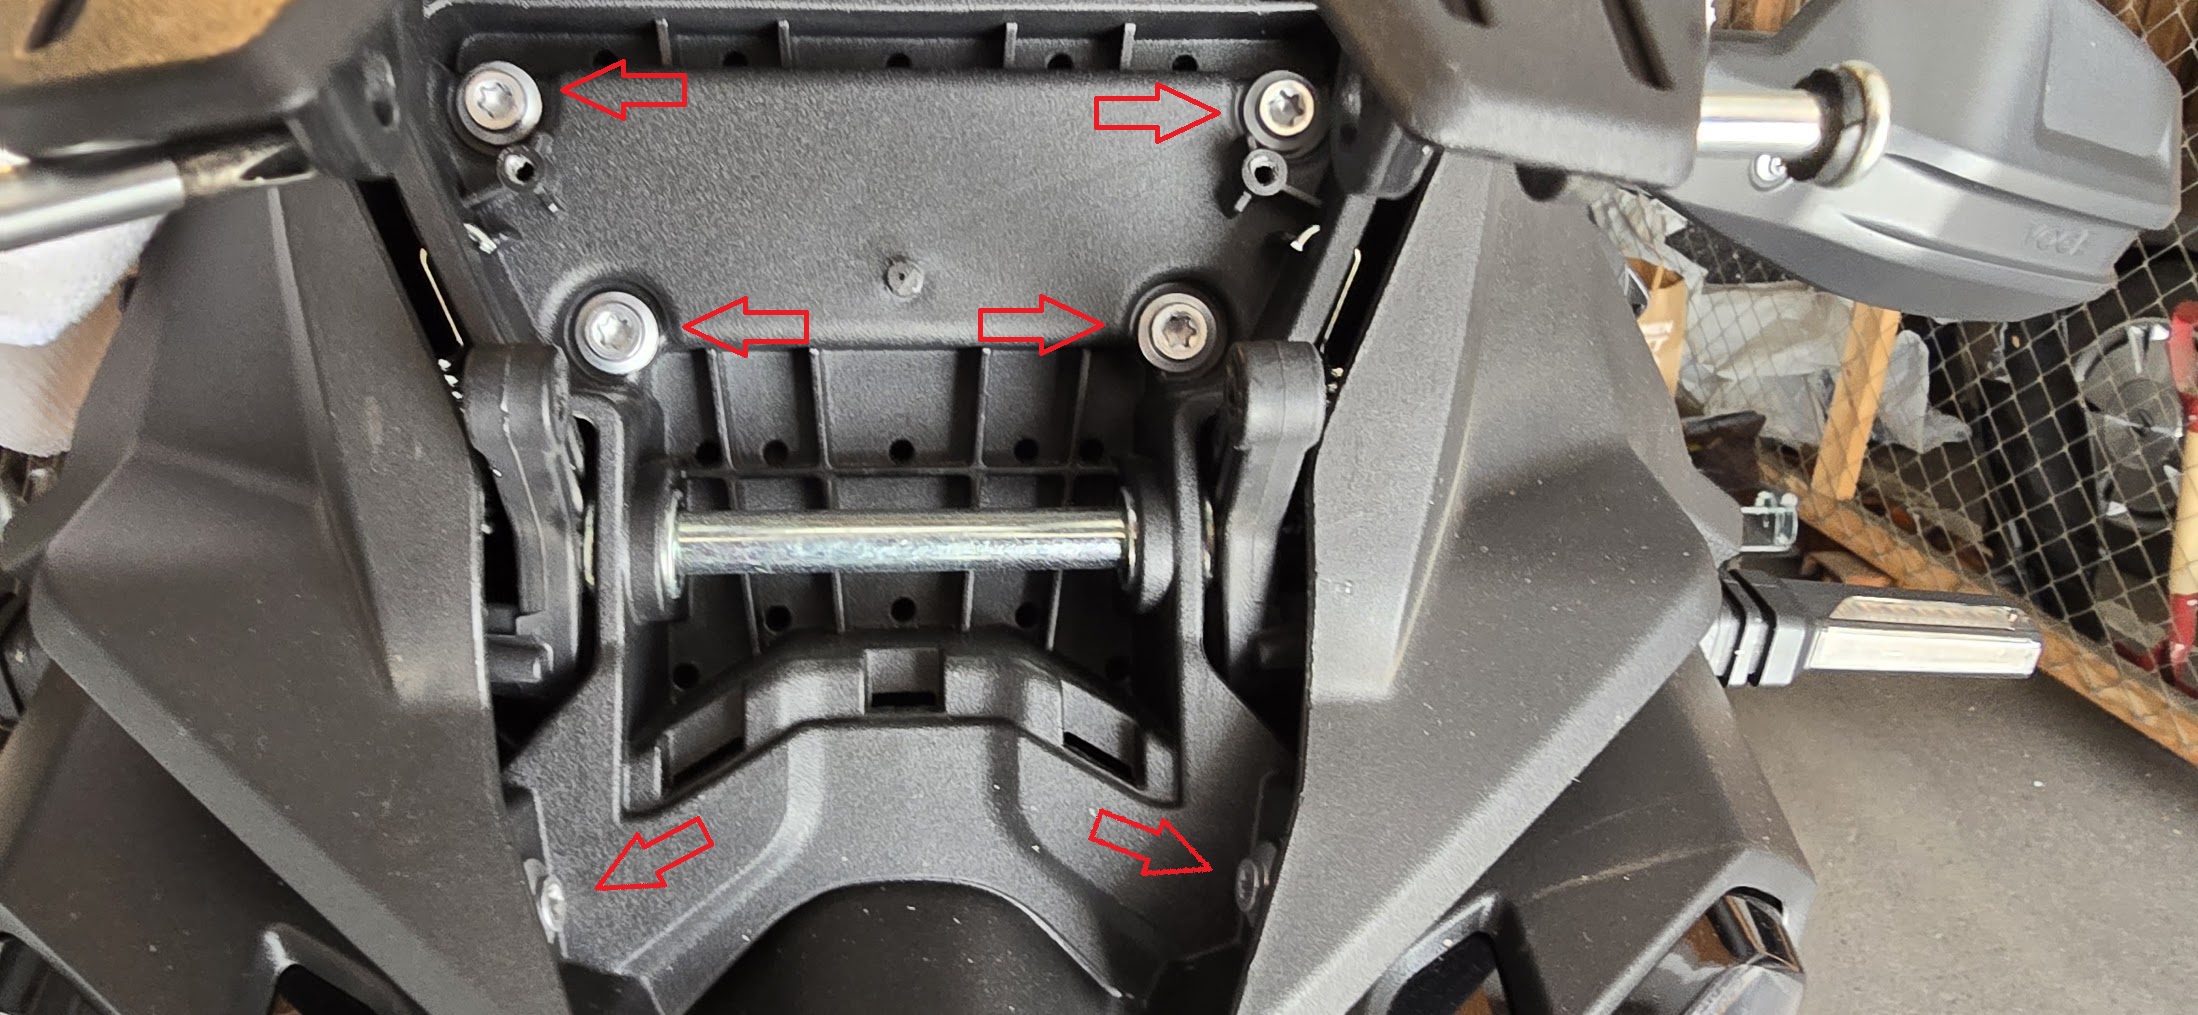
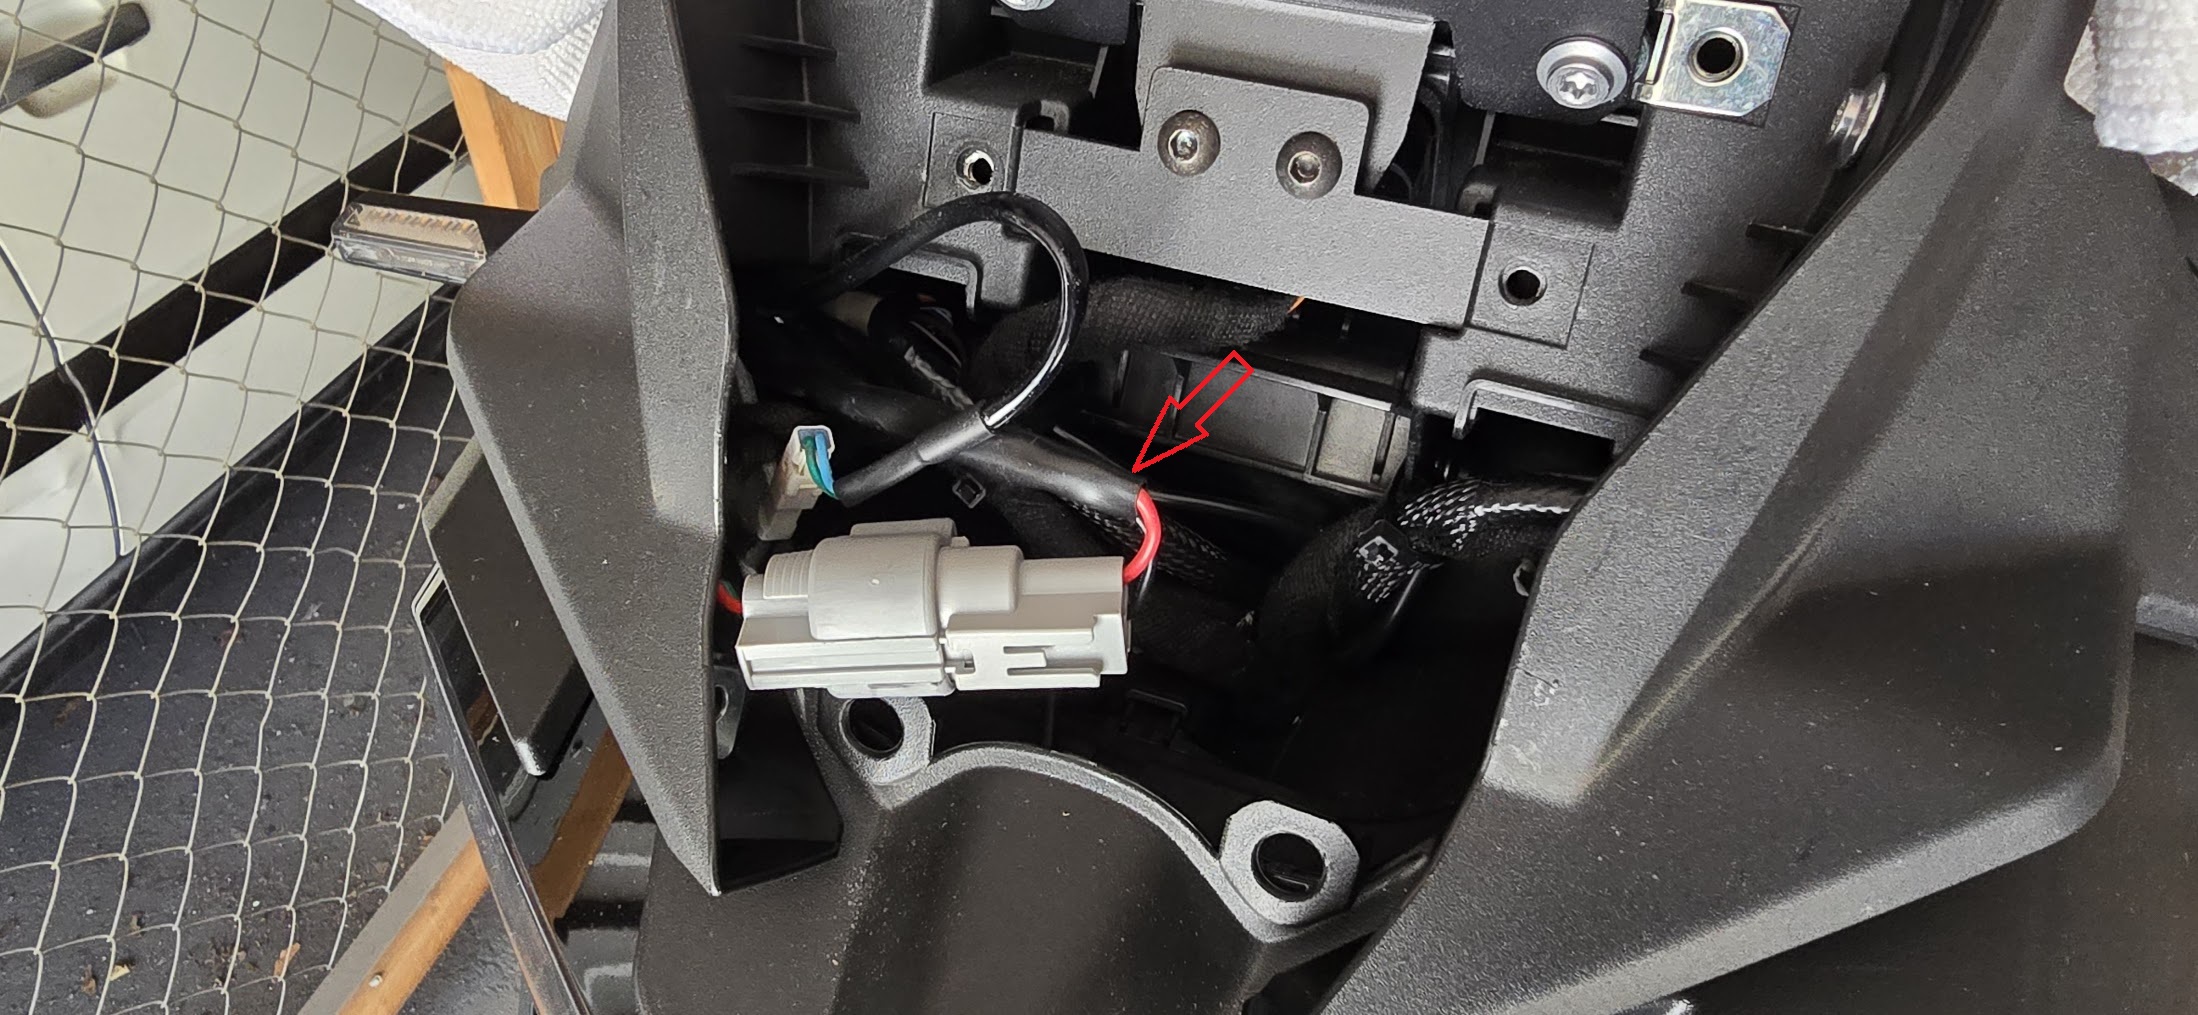
With the assembly off you can see the connector for the 12V socket (will be tucked down to the left but can easily be pulled out), and the screw points for the bracket.
Mounting the bracket
The custom bracket bolts on at the same spot behind the dashboard that you just opened up. The arm runs up and holds the screen above the stock display. Get it bolted in now while everything is open.
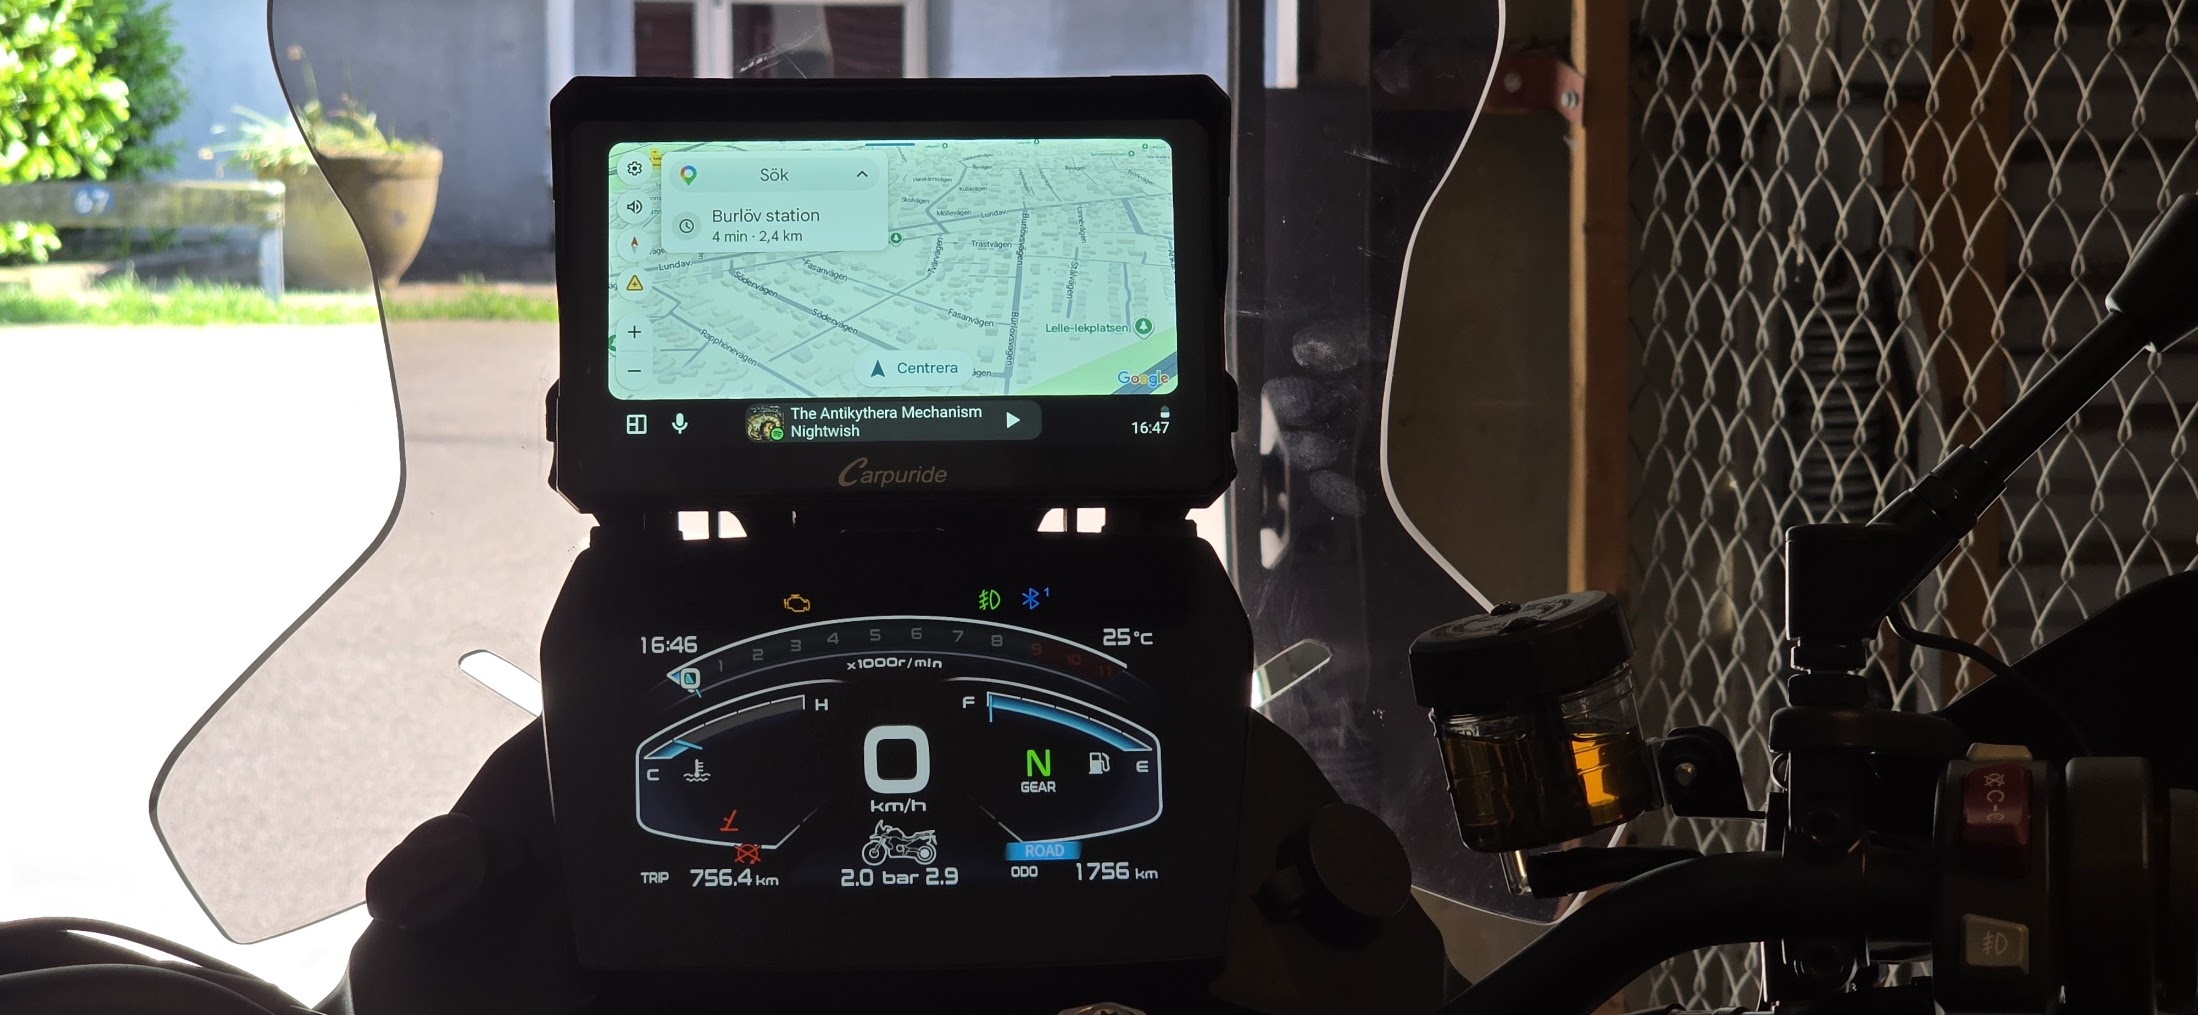
This would also be a perfect time to mount the Carpuride unit - while doing so, be sure to hop on the bike to see that the unit doesn't cover the bike's own display or sit at an awkward angle.
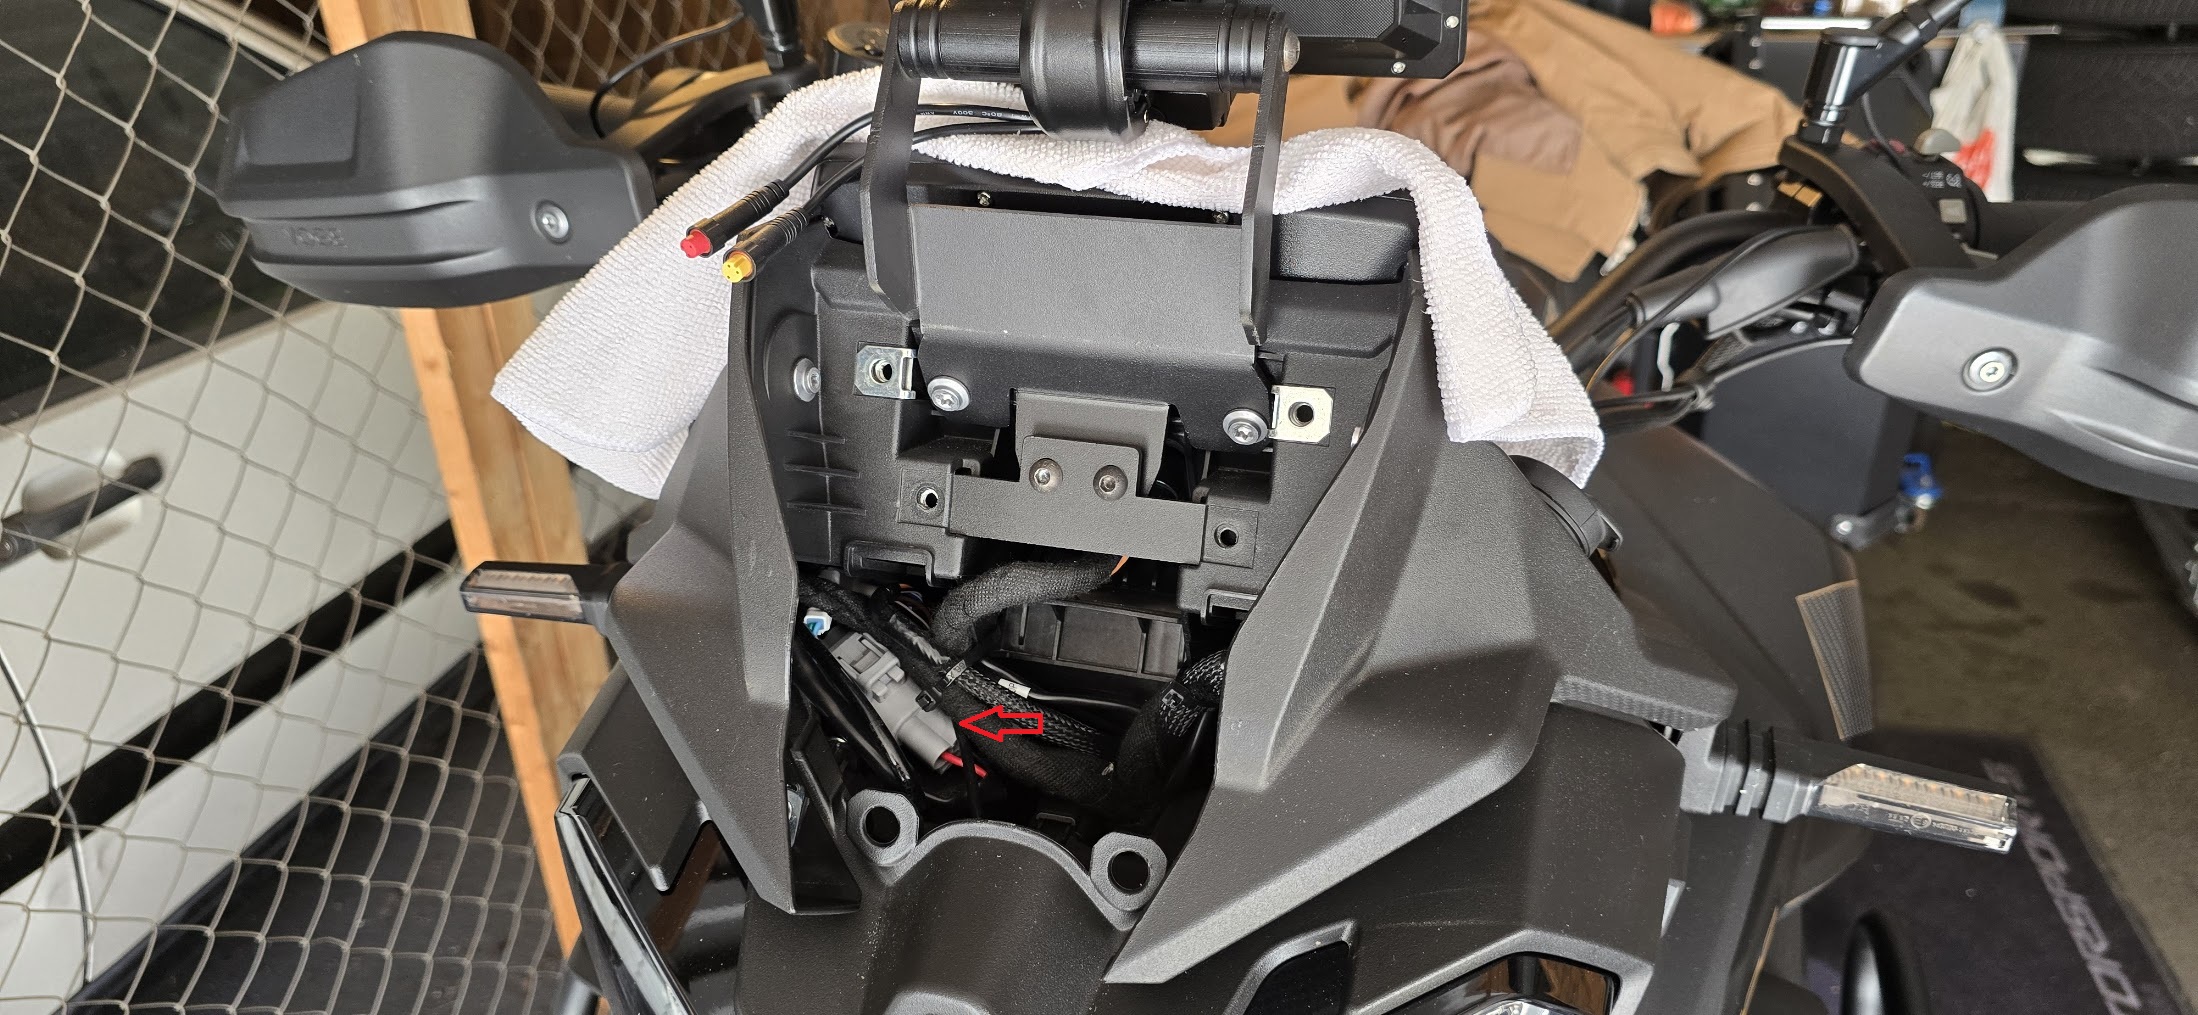
Wiring power
I powered the unit off the 12V socket (the cigarette lighter type socket). Tapping that feed means the screen only comes on with the ignition, which is what you want. By doing this you're also not risking any battery drain when the bike is off.
The original socket cable uses a red and black scheme, which matched the Carpuride hardwire kit, so wiring was straightforward. I cut the cables a bit above its male connector going towards the 12V socket, not into the main wiring loom. That keeps the cut local and reversible, and it leaves the main wiring loom untouched.
Join the Carpuride hardwire leads to the socket feed with the solder-seal connectors, red to red and black to black, then heat each one until the solder ring melts and the sleeve shrinks down. Check the screen powers correctly before you seal everything up if you have any doubt about polarity.
The Carpuride BM05 cradle has two main connectors. The red one is the power connector, which is the one you care about here. There is also a yellow connector that goes to a separate wired controller you can optionally mount on the handlebar. The controller is included in the kit, but I left it out. It did not make sense for my setup, and the touchscreen does everything I need.
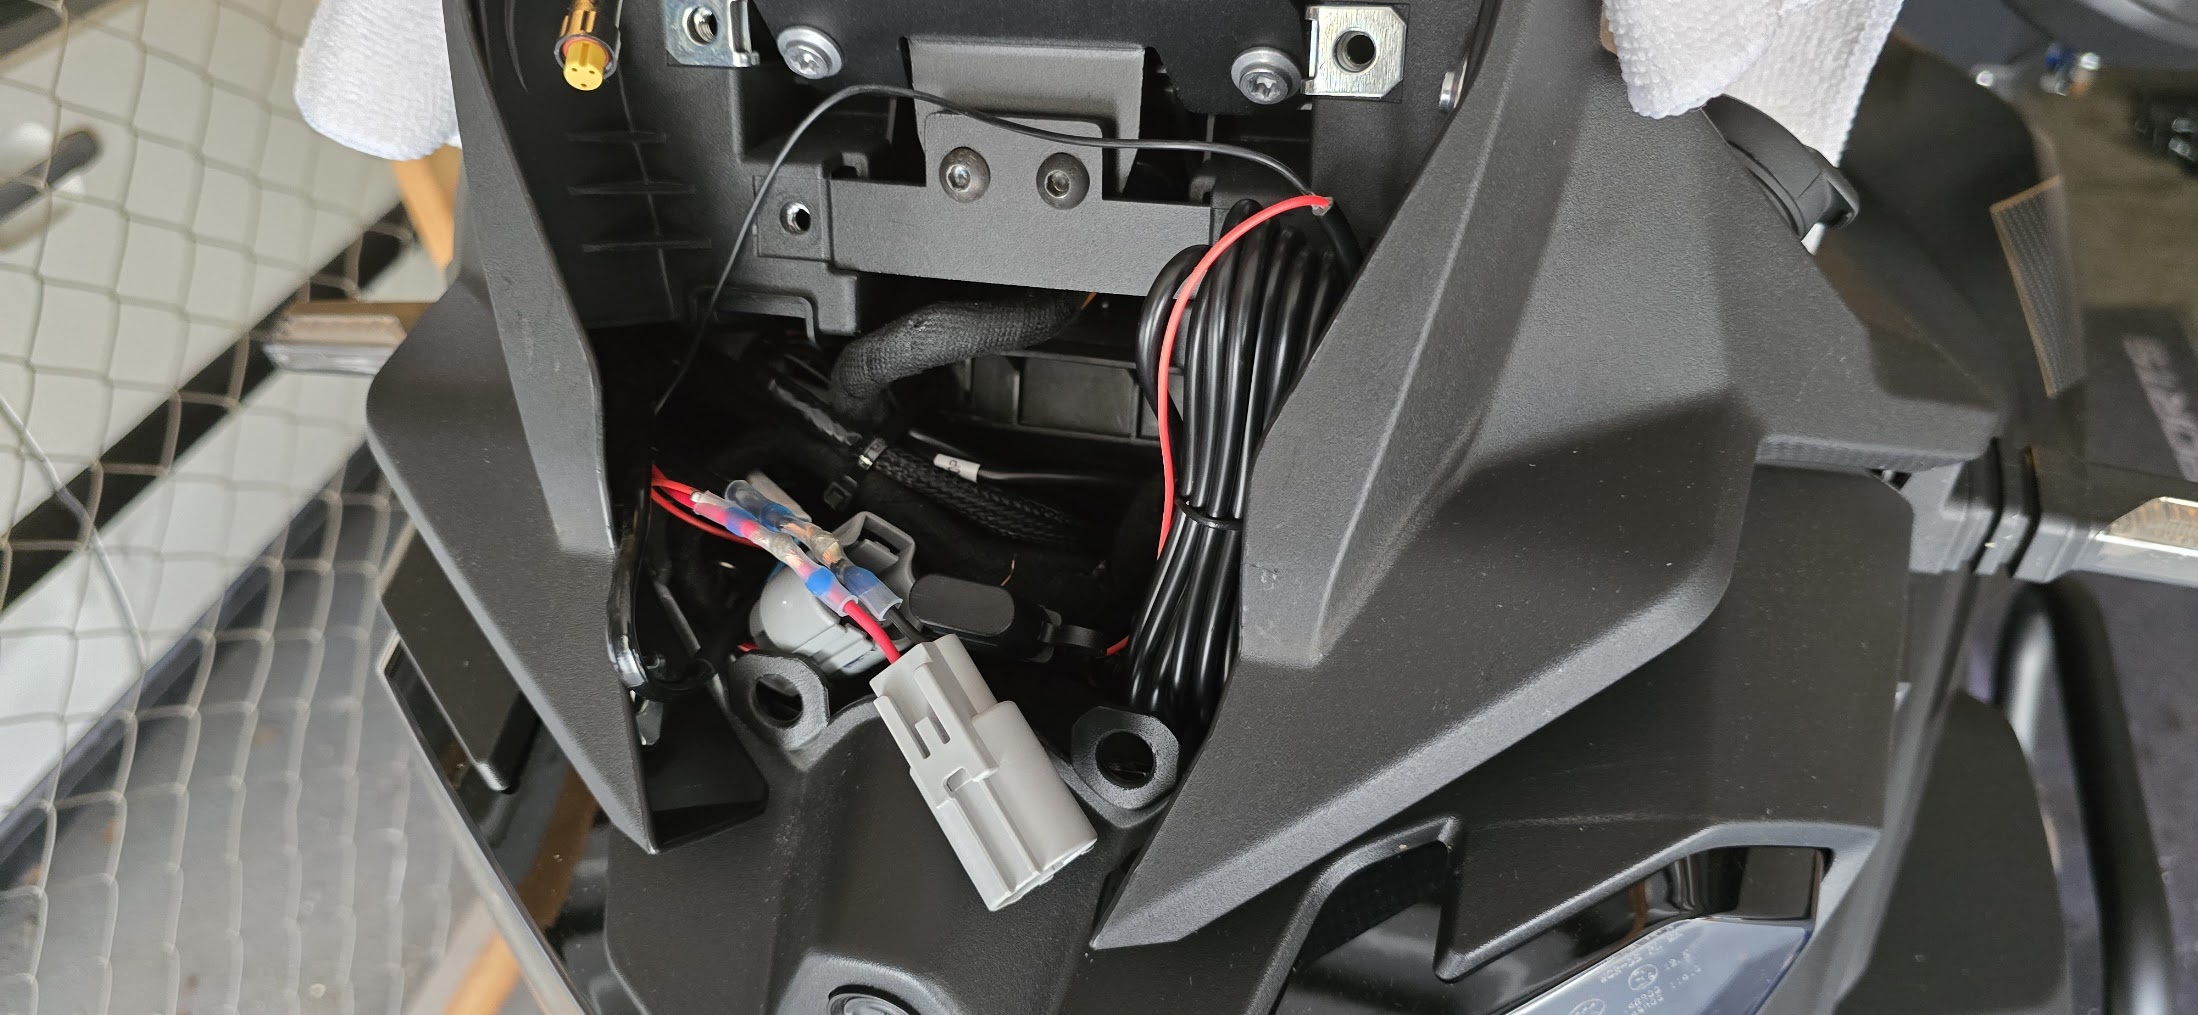
Routing and reassembly
The cables run down behind the dashboard and along the bracket where everything else sits, so nothing needs zip-tying. Tuck them in as you go.
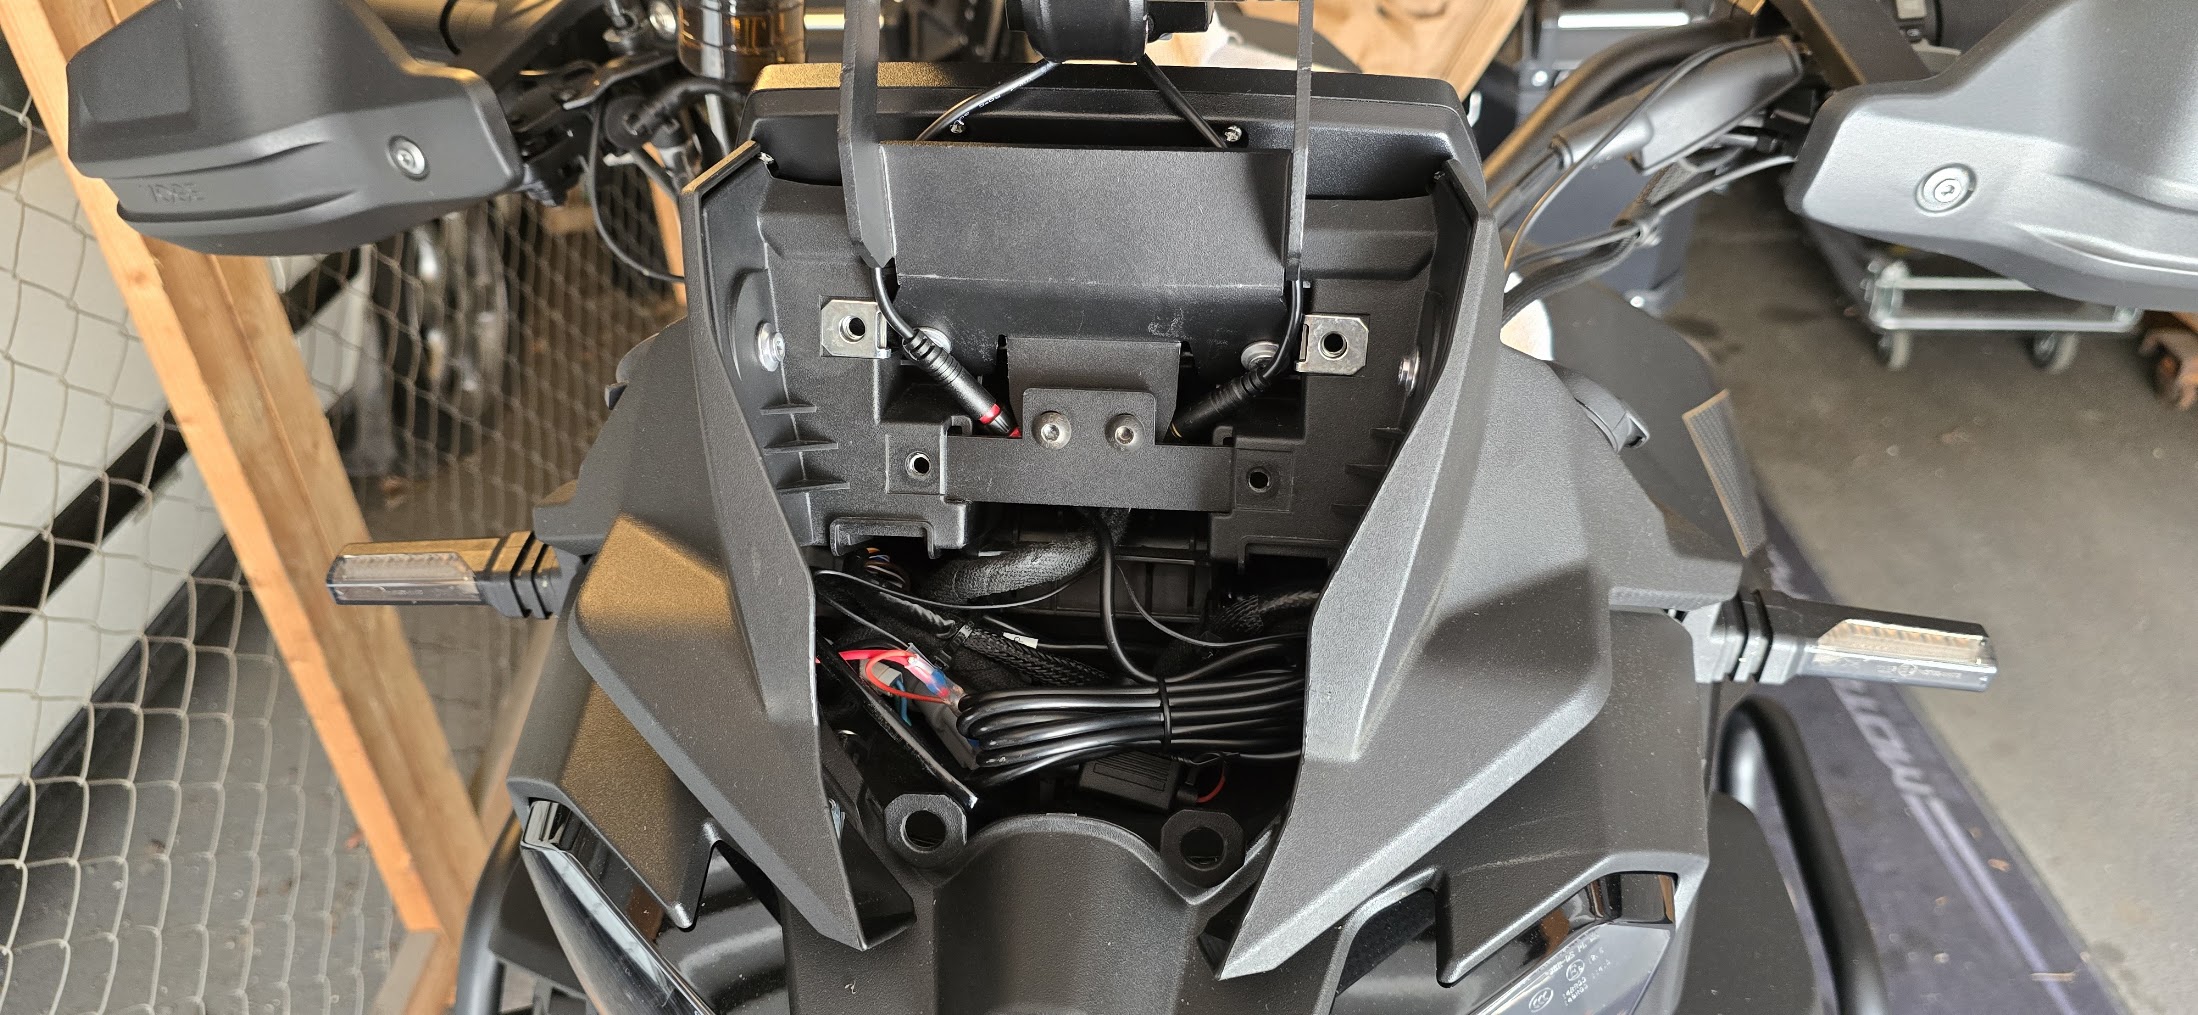
Put it all back together in reverse: assembly screws (4x T30, 2x T25), the Phillips cover, clip the windscreen holder back down, refit the windscreen. Make sure nothing is pinched and the screen clears the dash through the full steering range.
First boot
Press the bike's start/on button. The Carpuride powers up with the ignition.
Battery drain
Because the 12V socket is switched by the ignition, the Carpuride loses power when you turn the bike off, so there is nothing left running to drain the battery. If you instead wire the hardwire kit straight to the battery, the unit can keep drawing power after the key is off. In that case either hold the power button for a few seconds before shutting the bike down, or enable the hidden battery-protection setting: open Settings, tap the system version number eight times, then turn on battery protection.
Notes
Code VOGERIDERS gets you 30% off the W702S Pro at carpuride.com.